Here is an easy tutorial on how to create your very own "antique" wooden sign that you can either give as a gift or mount around your house for an extra "oomph". Original idea found from Diddle Dumpling with just a few variations of my own. Let's get started!
Materials:
-Wooden board (size is entirely up to you! You can find these laying around like I did, or go to your local hardware store like Home Depot & see if they will give you any scrap wood from their lumber section)
-Container of water
-Black Acrylic paint
-Large bristle paint brush
-Paint brushes of varying styles (optional)
-Printed out text you wish to have on your sign
1)
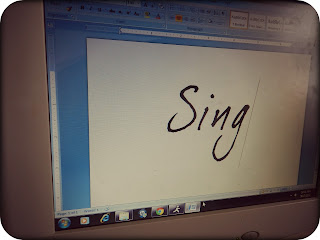
Pick out your desired font and text on a Word document. I recommend sticking to one or two words; a whole sentence can get quite muddled. PRINT OUT SO THE FONT COMES OUT BACKWARDS. This is key when transferring the text to the wood. There should be a mirror option to select before you print.
Want cool fonts like this one? Visit www.dafont.com for FREE downloadable fonts! A huge huge selection.
2)
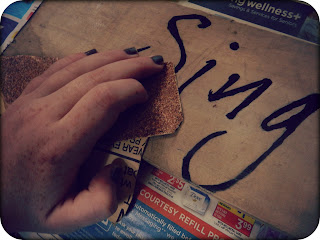
Here's the fun part: distress your wooden board! If you want that antique look, take a hammer and some nails, and bang away. This board was already darker in color so I sanded it up with some sand paper and hammered in some holes and nails to get the worn look I wanted.
3)
Place paper on the wood so the ink side is face down
4)
Using your bristle brush, wet the paper where the text is. Be sure not to soak it too much, otherwise holes will form in the paper and the ink will not be able to transfer to the wood.
5)
Get a sharpie marker and use the rounded head end to rub horizontally/vertically over the text. This helps transfer the ink. Do not press too hard or rub a spot repeatedly. This will cause the paper to tear and we don't want that! Going over the text area once should do the trick; make sure you indeed rub ALL of the text.
6)
Once you remove the paper, it should look something like this; it may be darker or it may be lighter for you. You can either leave it like that if you like the faded look, but I wanted it to be darker so I decided to fill it in with the acrylic paint.
If your font is thinner like mine, use a smaller brush. Here I am using a thin angled brush from Crayola. Let it dry for about an hour.
7)
Distress distress distress! (If you want). I wanted it to look more faded so I took a 100 grit sand paper and brushed it all over the word to roughen it up. Even then I still wasn't satisfied so I scratched at it with a nail, rougher sand paper, then used some grey paint I found in my dad's workshop I loosely brushed on the wood.
The finished product! The sign on the left I made awhile ago using the same process. The sign used in this tutorial I am giving as a gift to my vocal teacher.
Have fun and if you have any questions/difficulty, comment!
--Jen


The Guest Room sign that I've been dreaming up in my head for months is now complete! I was first inspired by this pin and thought it would be cute to come up with some kind of statement piece to go above the bed. custom farm signs
ReplyDeleteThat is awesome! So glad to have inspired you(: I'd personally love to see the piece you created.
Delete