I'm really big on candles. Perhaps borderline obsessed. The warm crackle of a wick, the soft and gentle scent of your choice drifting in the back of your senses as you go about the things you do in your own home just delight me! I'm open to trying any sort of scented candle, however, I will always always always have a permanent favor- beeswax. Nothing beats then a natural material and the soft smell. Beeswax candles can sometimes be difficult to find and I need them on demand! This is why I went about making my own-and now you can too! It's simple and I will take you step by step through the process.
1. Gather your materials!
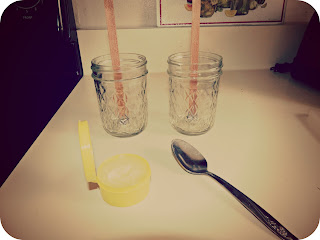
- Get a substantial amount of beeswax from an online store, local beekeeper, craft store or perhaps check a flea market and get some like I did!
- Tacky Wax (I bought mine at Michaels Crafts)
- Wicks, wood or regular, (any craf store)
- Mason jars
- Scissors
- Old Pot
 2. Attach the Tacky Wax to the bottom of your wick.
I used a spoon to remove the Tacky Wax and press it on the bottom of the wick because it is quite hard.
3.Apply the wick( with the Tacky Wax pressed on the bottom) to the bottom of the mason jar. Press the metal on the bottom of the wick down firmly onto the glass with a spoon.
4. Place the solid beeswax into a cooking pot. I would highly advise using and old pot, because mine was not salvageable after this project.
You do not want the heat to be too cool, because when the wax melts it will reform on the sides of the pot very quickly. Also, you do not want the wax to be too warm, because it can bubble and stick to your kitchen in the form of little dots!
So, I suggest, on traditional stove top, to set the heat to 2, low heat.
When the wax is entirely liquid, pour it into the jars and let it cool for a good twenty to thirty minutes.

5. After the wax is entirely solid again, your candles are ready to be be lit!
I garnished mine with a green and white striped ribbon around the top. A hot glue gun will work best with this, but plain old Modge Podge will also work just as well.
Also, if you'd like you can get creative with what to pour the wax into. Here, I used a ceramic white teacup.
Enjoy and Happy Crafting!!


No comments:
Post a Comment